Instant
01 · Ask
Ask the AI a follow-up
Got more questions about washing machine door seal repair? Describe the bit you're unsure about — the AI explains options, sequencing and what to ask the appliance repair.
Perished, mouldy or leaking door bellows — swapped and pressure-checked, no slow drips.
You've read the brief on washing machine door seal repair. Now lean on us to find the right appliance repair — and stay in control of the job.
Got more questions about washing machine door seal repair? Describe the bit you're unsure about — the AI explains options, sequencing and what to ask the appliance repair.
Costs, timelines, pitfalls and the right questions to ask before any appliance repair starts on washing machine door seal repair.
Itemised quotes from up to 3 local appliance repairs on washing machine door seal repair — so you can compare like-for-like, not lump sums.
Ready when you are
Enter your postcode and get free quotes from local pros.
Four moves that separate a smooth job from a nightmare.
Coins, keys, or bra wires left in pockets are the #1 cause of seal punctures. Always check pockets before a wash.
Leaving the door closed between washes traps moisture, leading to black mould that eats into the rubber and causes smells.
If the seal's drain holes aren't at the 6 o'clock position, water will pool in the gasket and cause premature failure.
Very cheap seals can be thinner and less heat-resistant, leading to warping during high-temperature "white" washes.
Indicative UK ranges and what affects price.
By job type
Quote spread is typically ± 18% — always get 3 quotes.
Appliance Repair quick-view
Appliance Repair explained
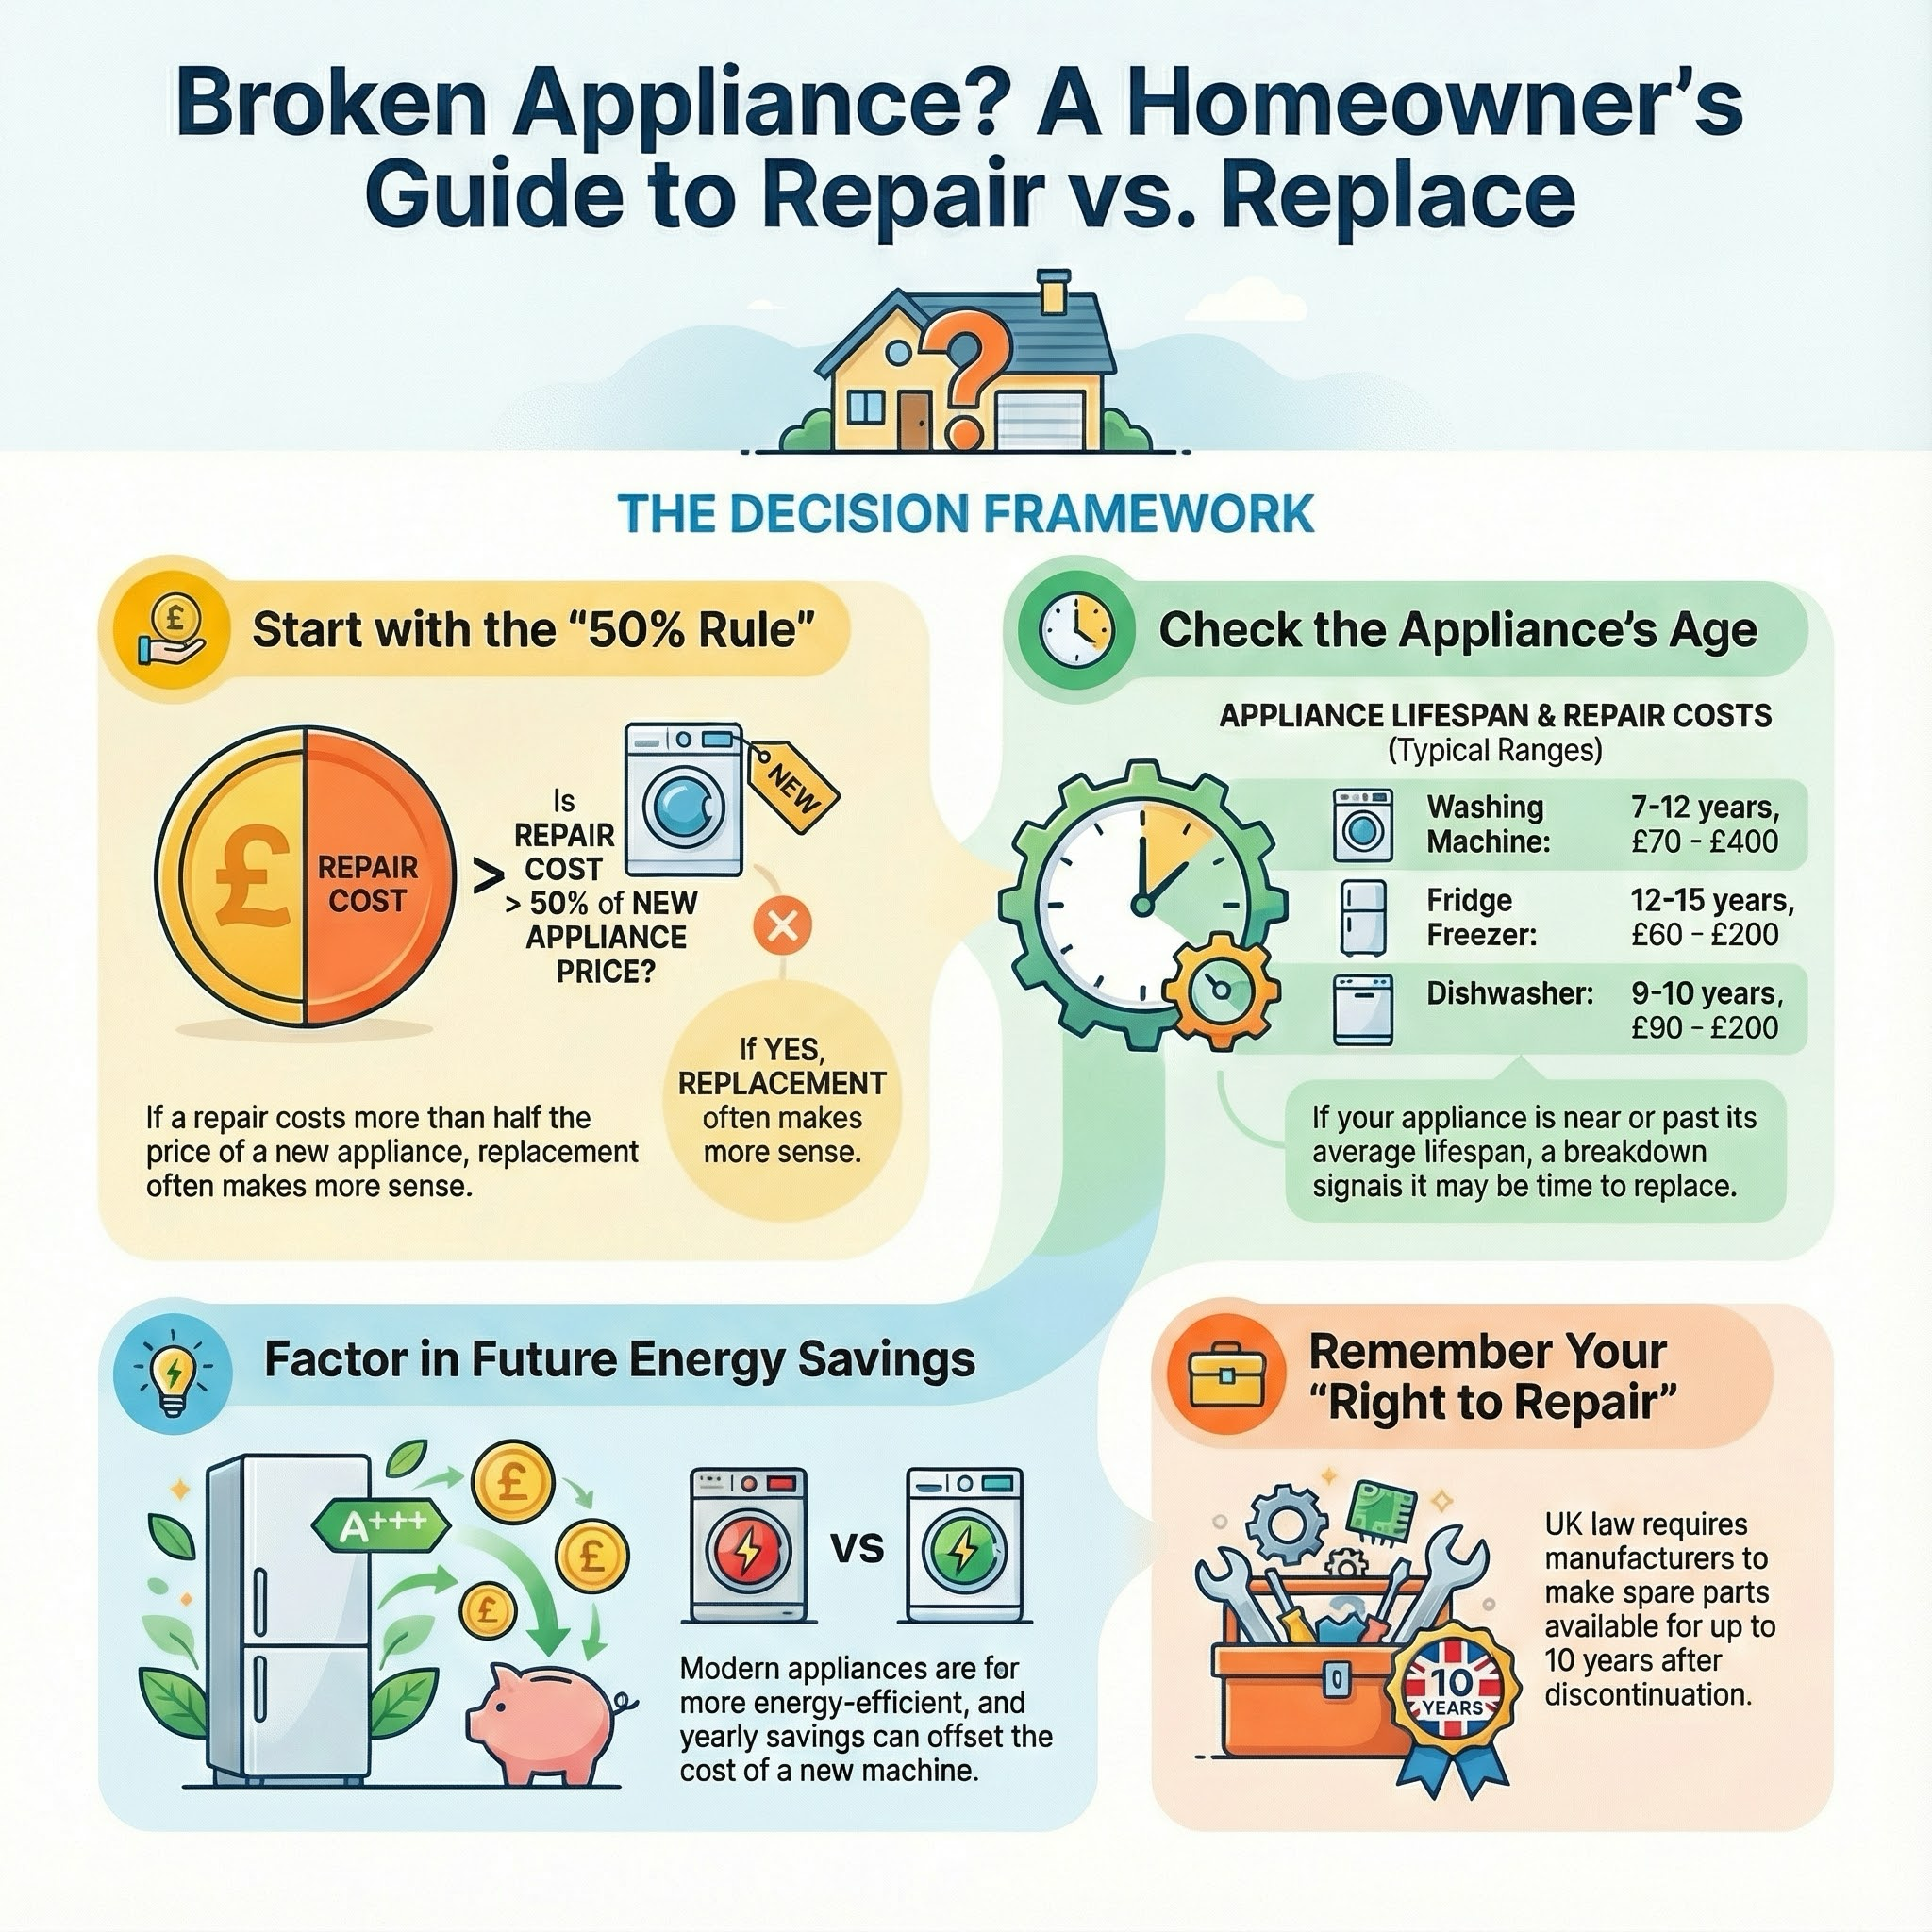
Replacing the seal is a cost-effective alternative to buying a new appliance. Whether you have a freestanding Bosch or an integrated Neff, getting the seal replaced professionally ensures a watertight fit and extends the life of your machine by several years.
Prices for washing machine repairs in the UK vary based on your location and the brand of your appliance. Premium brands like Miele or Dyson often require more expensive proprietary parts compared to budget brands like Beko or Indesit.
| Item | Low £ | High £ | Notes |
|---|---|---|---|
| Call-out / Diagnostic Fee | £60 | £110 | Often deducted from the final repair bill. |
| Labour (Standard Repair) | £50 | £95 | Higher rates apply in London and the SE. |
| Replacement Seal (Part) | £25 | £130 | OEM parts cost more than generic equivalents. |
| Integrated Machine Surcharge | £20 | £40 | Covers the extra time to remove from cabinetry. |
| Total Average Cost | £135 | £275 | Inc. VAT and basic parts. |
The main factors affecting your quote will be the accessibility of the machine and whether the engineer can source a "pattern" part (a high-quality compatible version) versus a genuine manufacturer part.
While DIY seal replacement is possible, it is notoriously "fiddly." The retaining springs are under high tension and require specific pliers or significant strength to reseat without puncturing the new rubber. If you misalign the seal by even a millimetre, the machine will leak, potentially causing more damage.
Professional repairers provide a guarantee on their work, and many will perform a basic electrical safety check (PAT test) as part of the service, giving you peace of mind that the appliance is safe to use.
No. The seal is subject to high temperatures, chemical detergents, and intense vibration. Adhesives will invariably fail, leading to a flood while the machine is unattended.
A small amount of "new rubber" smell is normal for the first 2-3 washes. However, if it persists, the seal may be rubbing against the drum, indicating it was fitted incorrectly.
Always leave the door slightly ajar after a cycle to allow the drum to dry. Wipe the inside of the gasket folds with a dry cloth once a week.
If the machine is otherwise in good condition, yes. However, if the bearings are also noisy, it is usually more cost-effective to replace the entire appliance.
No. Washing machine seals are model-specific. Even within the same brand, different drum sizes and door designs require different gaskets.
This guide was written with AI assistance and is intended for general information only. Prices are estimates based on UK averages and may vary by region. Always get at least three quotes and consult a qualified professional before starting any work.
Ask follow-ups in plain English. The AI explains options, sequencing and what to ask the appliance repair — so you walk in informed.
Microwaves are a staple of the modern UK kitchen, offering convenience for everything from defrosting to full meal preparation. While basic freestanding models ...
READ GUIDE →GuideA faulty fridge or freezer is one of the most urgent domestic repairs, with food safety and waste being the primary concerns. For many UK homeowners, a professi...
READ GUIDE →GuideA cold oven is a major disruption to any UK household, but a failed heating element is one of the most common and cost-effective repairs you can undertake. Inst...
READ GUIDE →GuideScope of Works • inspect appliance and perform diagnostic checks (power, suction, switches, wiring) • clean and test filters, dust bin or bag and airway for blo...
READ GUIDE →GuideA faulty microwave display is a common frustration for UK homeowners. Whether the screen has gone completely dark, is flickering, or showing unintelligible "gho...
READ GUIDE →GuideA faulty oven can bring a UK household to a standstill, turning meal times into a logistical challenge. Whether it is a failed heating element, a noisy fan, or ...
READ GUIDE →